
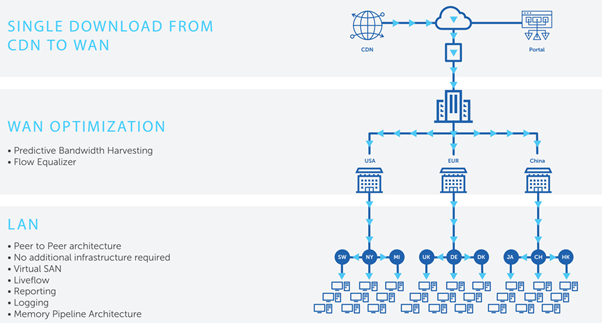
Adaptiva has introduced the OneSite Intune Edition, this new addition to the OneSite suite assists with the delivery of Win32 apps in your environment and eliminates the reliance on Delivery Optimization and the potential of having to set up on-premise Connected Cache servers hosting the delivery optimized content. It takes advantage of the Adaptiva Zero Footprint Cache and therefore reduces cost on hardware, licenses, and network.
By slicing up the company’s topology in the Adaptiva Workbench, you are able to control the flow of content download for Win32 apps and ensure you are getting maximum efficiency by reducing the amount of traffic which needs to flow out to the Internet. Think of the advantage of reducing this traffic; it can be configured to ensure there is only one download from the cloud to a client in the Adaptiva Central Office or allow specific offices to get one copy of the application and share it across the remote location.
By utilizing the proprietary predictive bandwidth harvesting technology, administrators can relax knowing that the solution will automatically adapt itself to use only that amount of bandwidth which is not actually being used at that moment in time, ensuring business applications can get through with priority.
How can I get started with all this goodness?
For the first part of the process, it is important to ensure that all your devices have the Adaptiva client installed. You will need this to be able to tap into the P2P technology.
The Adaptiva client can be pushed out as a Win32 app via Intune, with all the relevant parameters for install. There are plenty of guides out there which show you how to deploy a Win32 app but I recommend you take a look at the official Microsoft documentation on the subject https://docs.microsoft.com/en-us/mem/intune/apps/apps-win32-app-management.
You will need to ensure you have things in place ready for OneSite Intune Edition:
- An Azure Storage account will be used to store the package content. This will be the solutions content library in the cloud.
- To set up an Azure Storage account, the account used to do this should be assigned to the Intune administrator role or have Global Admin permissions.
In the Azure tenant, search for Storage Accounts and then click Add.
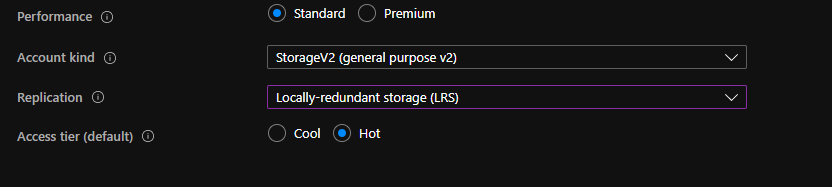
Now it’s a case of following the wizard with the settings provided by Adaptiva, for example, choosing Locally Redundant Storage (LRS) as it’s the least expensive option.
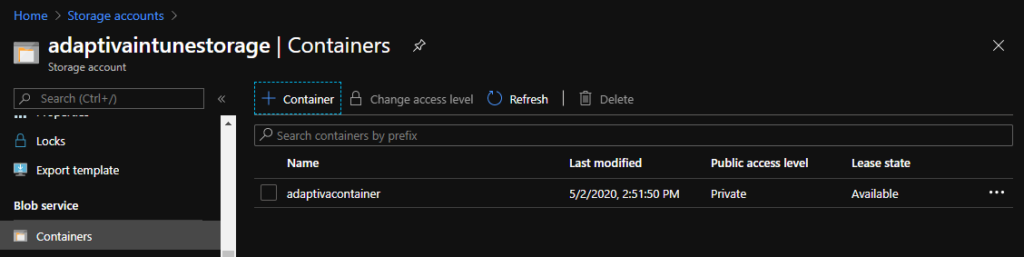
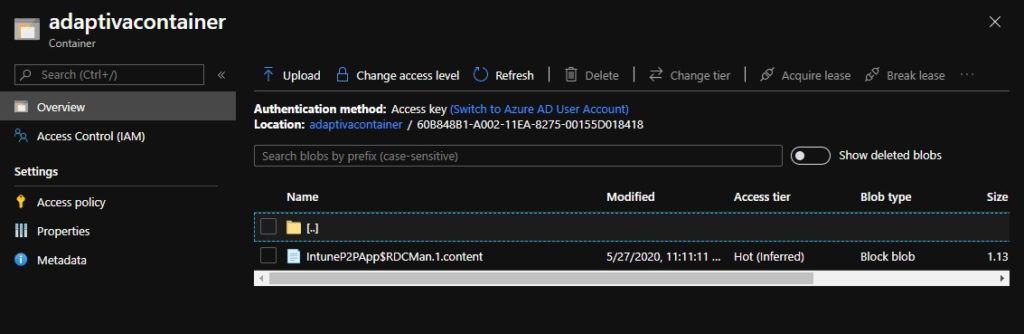
When the Storage Account is created, navigate into it, and scroll down to Blob Service. In here is a Containers option. Create a new Container; this must be lower case and public access level set to Private (no anonymous access). As you can see, I have created a container called adaptivacontainer.
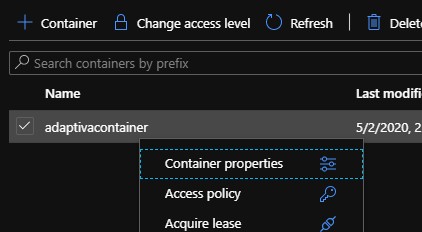
Right-clicking on the container will bring up the context menu. Selecting Container properties will take you to a page with some information which is needed in the configuration of OneSite Intune Edition in the Adaptiva workbench, namely the container URL.
Next up it is time to configure the Adaptiva workbench and prep an app.
In the Adaptiva Workbench, expand OneSite Intune and select Onesite For Intune to open the Intune Settings Tasks.
Under Manage Azure Blob Storage Settings you’ll enter the URL from the properties of the Container.
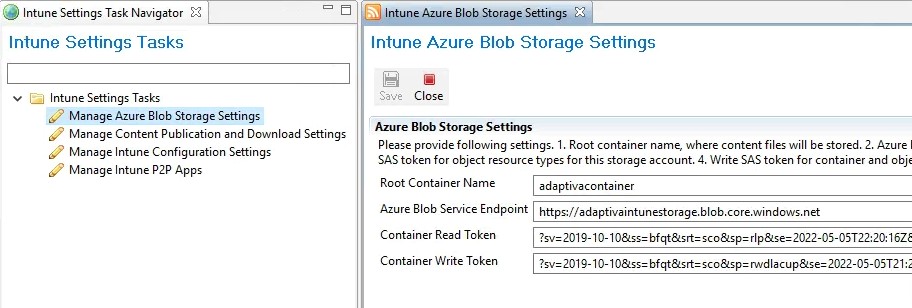
To get the Container Read and Write Tokens we need to create Shared Access Signatures in the Azure Storage Account. These tokens can only be retrieved when they are created; they cannot be retrieved later. Once created, the details can be entered into the Blob Storage Settings.
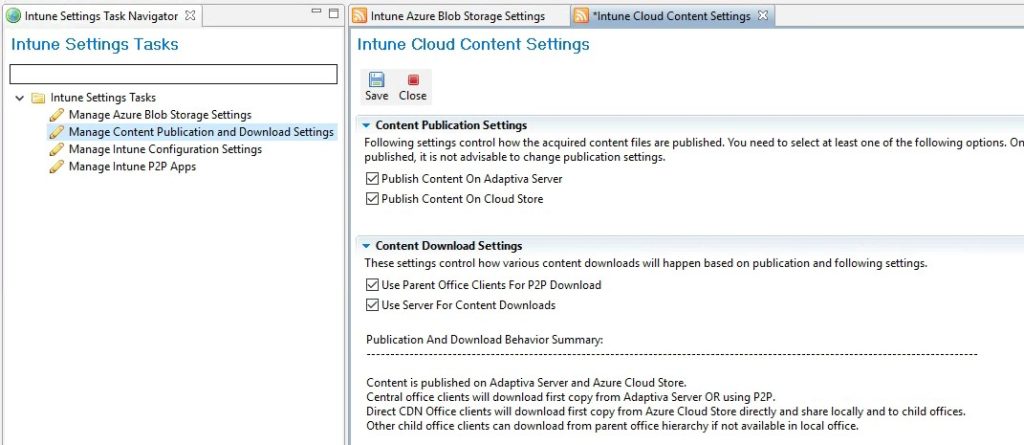
When it comes to defining the Manage Content Publication and Download Settings, choices need to be made based on where your devices are in the world. The Publication and Download Behavior Summary section is dynamic and updates based on the setting you define here.
It’s nice to get an overview of what impact the choices you make will have. You’ll need to be make decisions based on the topology of your devices but ideally our Internet based devices should be reaching out to get content published on the Cloud Store.
Before we move onto configuring the Win32apps in our environment, we need to set the Manage Intune Configuration Settings. An important process in the creation of a Win32 app for Intune is to convert the application into the .intunewin format. With Adaptiva’s solution, this is automated for you, but you need to grab a copy of the Win32 Content Prep tool from https://github.com/Microsoft/Microsoft-Win32-Content-Prep-tool, extract out the IntuneWinAppUtil.exe into a folder of your choosing and then point the Intune Configuration Settings to the file.

Creating the Intune App Content in the Adaptiva Workbench
Now onto the feature presentation: how we use the Adaptiva Workbench to create the app for Intune.
When we create our application, we’ll be creating something is which is automatically uploaded to the Azure blob storage and, also, stored on the Adaptiva server, depending on your configuration, in a compressed .content format plus we also create a 80kb .intunewin file which will be downloaded via Intune. By reducing the payload from Intune and then tapping into Adaptiva’s P2P technology we are reducing the network footprint of the application across your company’s estate.
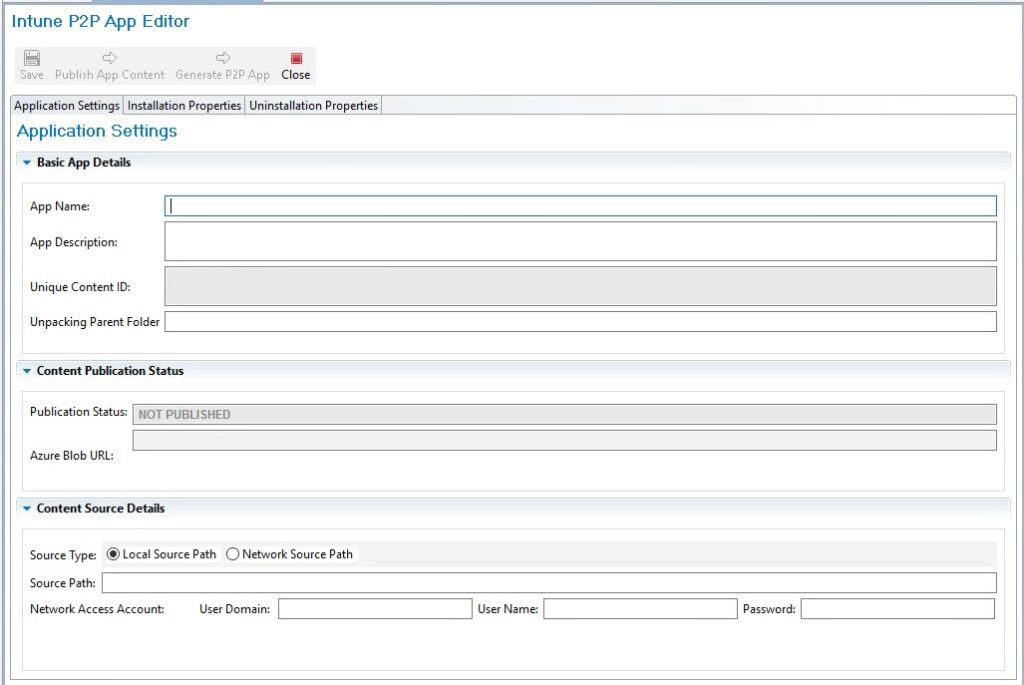
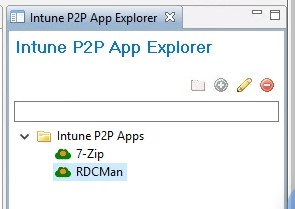
In the Manage Intune P2P Apps section, head over to the Intune P2P App Explorer and right-click to Create New P2P App.

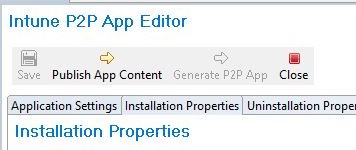
In the Application Settings tab, we need to give our app an App Name, App Description and then point to the Source Path. The Source Path is the location of the installer for the app. You can point to local or network as a source. You’ll see the publication status currently states NOT PUBLISHED. When we publish the app, details of the Azure storage location will be visible here. When you have entered the relevant information, click the Installation Properties tab.
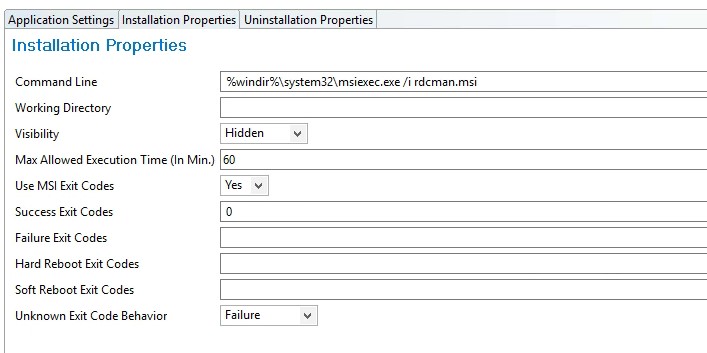
In the Installation Properties tab, you need to set the Command Line of the installer. Enter your installation command line, if you are installing an MSI, be sure to preface with %windir%\system32\msiexec.exe with the appropriate switches and properties. One important setting here is the Use MSI Exit Codes. If I’m packaging up an MSI, then I can utilize the existing MSI exit codes, so I have selected Yes.
There’s also an Uninstallation Properties tab where you can set the uninstall command for the application.
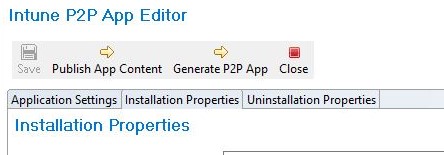
When you are happy with the configuration of the application, click the Save icon.
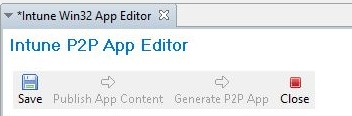
The option to Publish App Content will now be available. When you click the icon, this will create the .content file and upload to the Azure storage and/or the Adaptiva content library on the server.
With the content published, you’ll see the icon for the app in the Intune P2P App Explorer turn into a flag and when published the icon will turn into a green cloud. How long this process takes depends on your app size and connection out to the cloud.
The NOT PUBLISHED status in the Application Settings tab, will now report as PUBLISHED and the Azure Blob URL details will be visible.

You can return to the Azure portal and see the content file in your blob storage.
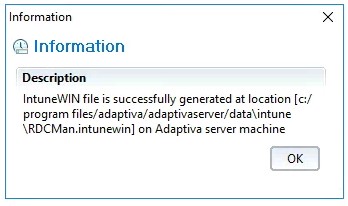
The icon to Generate P2P App will now be available. By clicking this the .intunewin file, required for usage in Intune, will be created.
Make a note of the location of the file in the Information window. This is where the OneSite solution has exported the .intunewin file to. You’ll need this for the next part of the journey, where we create the Win32app in Intune.
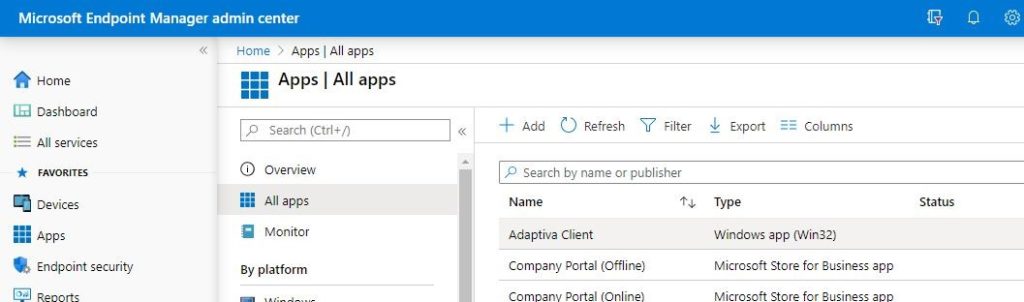
Adding the App to Intune
Since the Azure Portal is going to be deprecated management of devices later in the year, I recommend using the URL https://endpoint.microsoft.com to manage the creation of your apps.
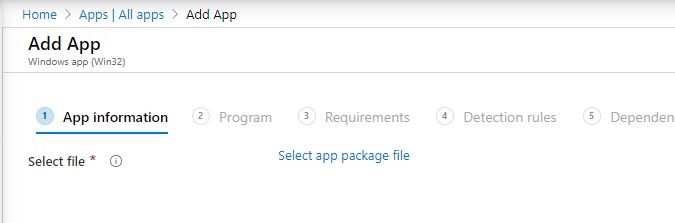
Navigate to Apps>All Apps and click Add.
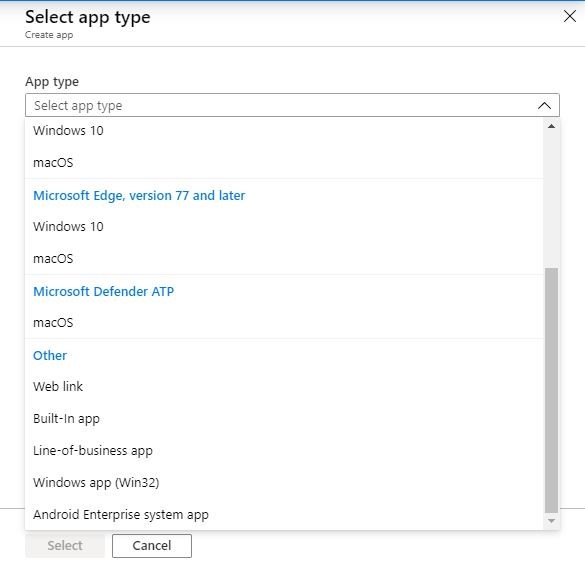
In the Select app type drop down, choose Windows app (Win32).
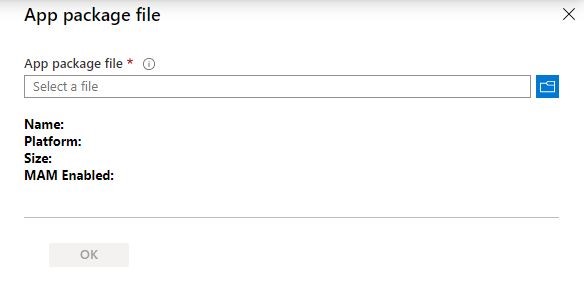
This will open the Add app wizard. Start by clicking the Select app package file.
Click folder icon to browse and upload the .intunewin file generated by OneSite.
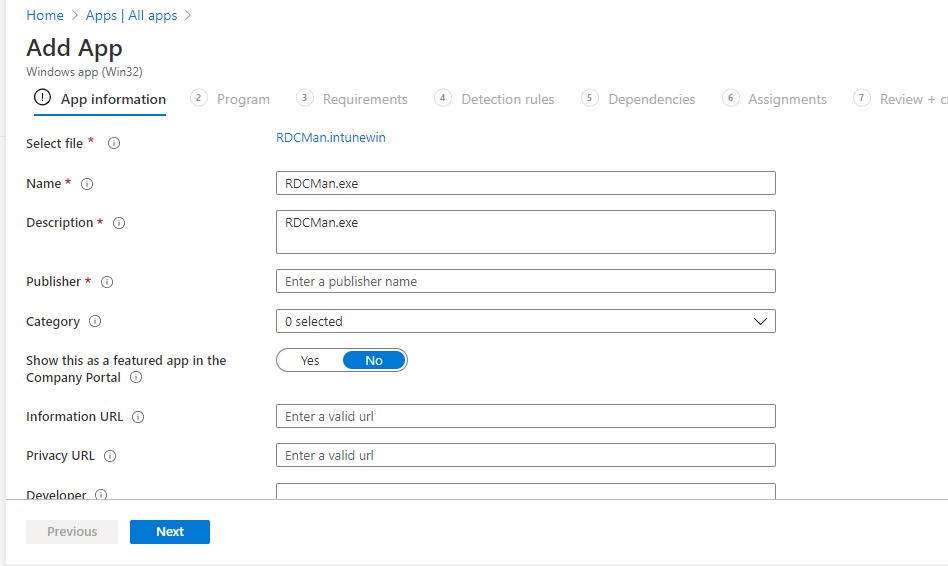
The Name and Description about the application will be prepopulated and there are other settings you can configure here, but as a minimum you will need to enter the Publisher information as this is mandatory. Click Next.
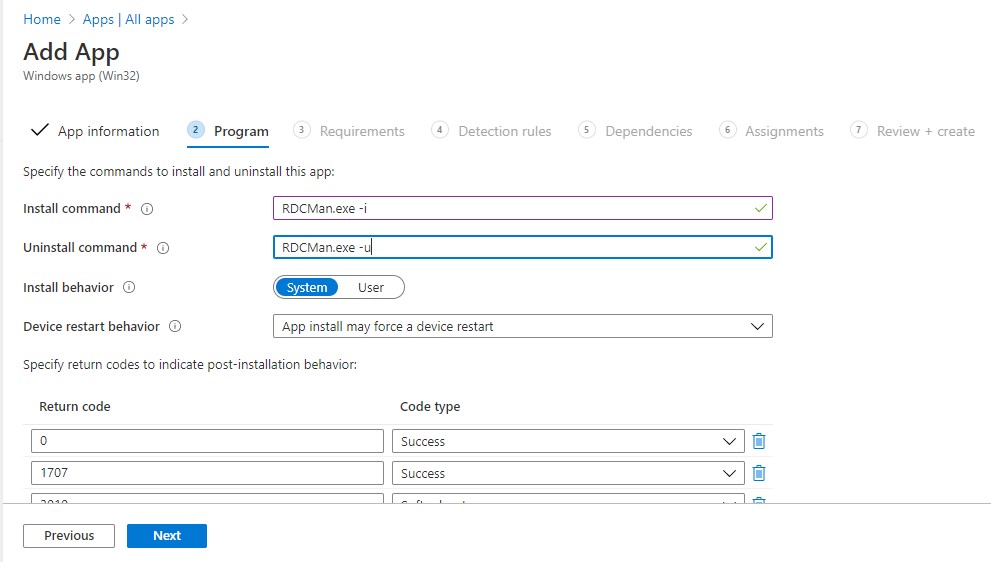
In the Program section of the wizard, you need to state an Install and Uninstall Command. The details needed here are the app name -I for install and the app name -u for uninstall. When you have configured all other settings to your requirements click Next.
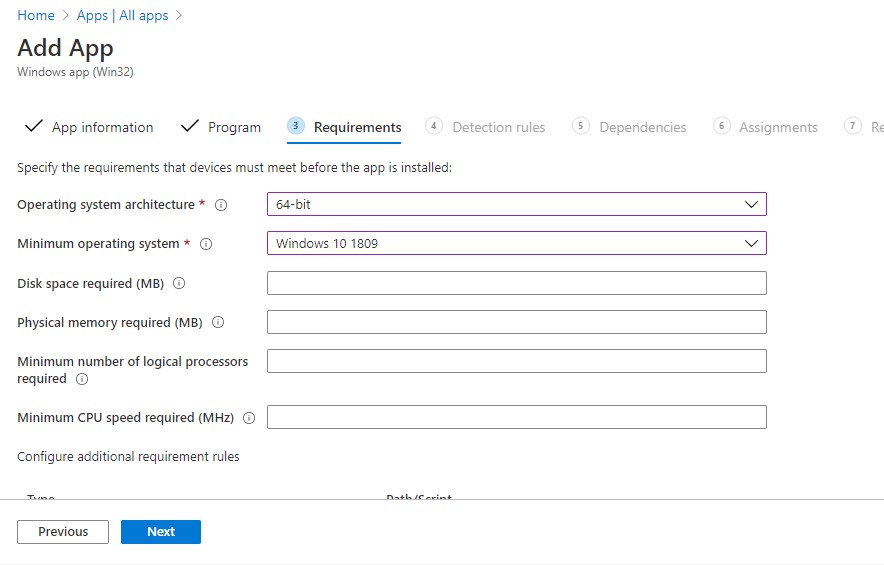
Under Requirements, you need to fill in the mandatory fields for Operating System architecture and Minimum operating system.
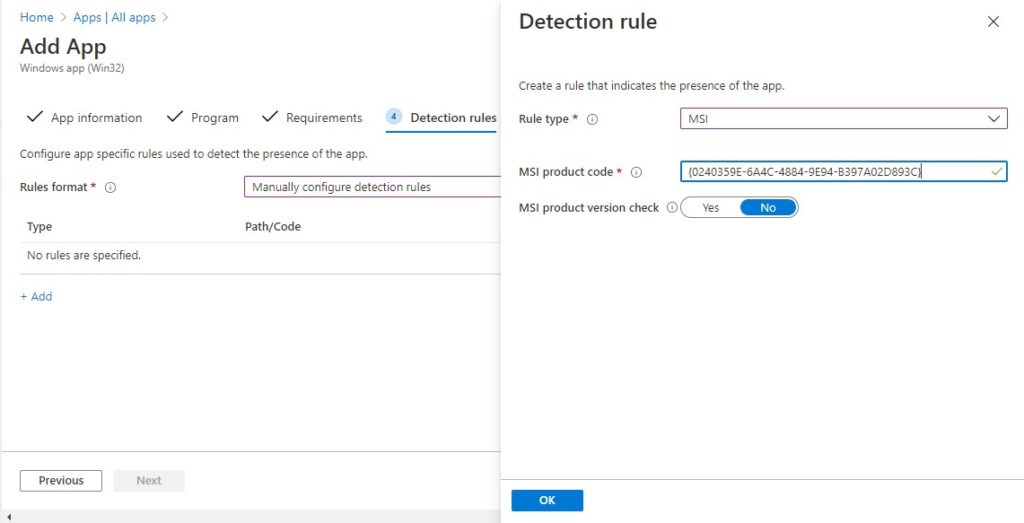
For the Detection rules, you may specify MSI, registry or file information.
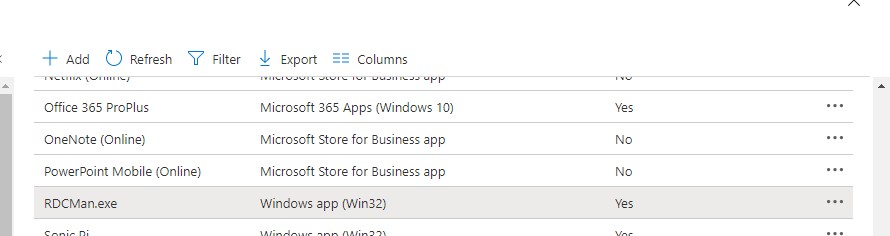
Complete the wizard by entering any dependencies and assigning to any groups for deployment. The application will appear in your list of apps.
On the Windows 10 devices
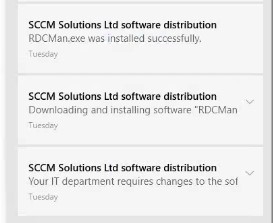
Depending on how you deploy your app, you will see it in the Company Portal, or it will download as a required app.
You’ll see the standard Win32 app notifications on your device.
We can track the installation of the application in the log files to ensure it’s using the OneSite caching technology.
In the IntuneManagementExtension log file located under C:\ProgramData\Microsoft\IntuneManagementExtension\Logs we can see the policy for the app being retrieved.
Get policies = [{"Id":"7a8992fd-033d-44a9-9f46-1ebdde8b3859","Name":"RDCMan.exe",
 "DetectionRule":"[{\"DetectionType\":1,\"DetectionText\":\"{\\\"ProductCode\\\":\\\"{0240359E-6A4C-4884-9E94-B397A02D893C}\\\",
 \\\"ProductVersion\\\":null,\\\"ProductVersionOperator\\\":0}\"}]","Version":1,
"Intent":3,"InstallCommandLine":"RDCMan.exe -i",
 "UninstallCommandLine":"RDCMan.exe -u","RequirementRules":"{\"RequiredOSArchitecture\":3,\"MinimumFreeDiskSpaceInMB\":null,
\"MinimumWindows10BuildNumer\":\"10.0.17763\",
 \"MinimumMemoryInMB\":null,\"MinimumNumberOfProcessors\":null,
\"MinimumCpuSpeed\":null,\"RunAs32Bit\":false}",
"ExtendedRequirementRules":"[]","InstallEx":"{\"RunAs\":1,\"RequiresLogon\":true,\"InstallProgramVisibility\":3,
\"MaxRetries\":3,\"RetryIntervalInMinutes\":5,
\"MaxRunTimeInMinutes\":60,\"DeviceRestartBehavior\":1}","ReturnCodes":"[{\"ReturnCode\":0,\"Type\":1},
{\"ReturnCode\":1707,\"Type\":1},{\"ReturnCode\":3010,\"Type\":2},{\"ReturnCode\":1641,\"Type\":3},{\"ReturnCode\":1618,\"Type
After the detection process has occurred, we’ll see the application installation process start on the device
[Win32App] ===Step=== InstallBehavior RegularWin32App, Intent 3, UninstallCommandLine RDCMan.exe -u IntuneManagementExtension
 02/06/2020 12:12:41 19 (0x0013)
RDCMan.exe -i IntuneManagementExtension 02/06/2020 12:12:41 19 (0x0013)
[Win32App] SetCurrentDirectory: C:\Windows\IMECache\7a8992fd-033d-44a9-9f46-1ebdde8b3859_1 IntuneManagementExtension
02/06/2020 12:12:41 19 (0x0013)
[Win32App] Launch Win32AppInstaller in machine session IntuneManagementExtension
 02/06/2020 12:12:41 19 (0x0013)
[Win32App] lastWin32Error 0 after CreateProcess IntuneManagementExtension
 02/06/2020 12:12:41 19 (0x0013)
[Win32App] lastHResult -2147024896 after CreateProcess IntuneManagementExtension)
02/06/2020 12:12:41 19 (0x0013
[Win32App] Create installer process successfully. IntuneManagementExtension
 02/06/2020 12:12:41 19 (0x0013)
During the process, we’ll see interaction with the content cache as the Adaptiva peering kicks in. The logs for Adaptiva are located in the C:\Program Files (x86)\Adaptiva\AdaptivaClient\logs folder.
In the AdaptivaRemoteInstallLog, there will be entries for the content being downloaded.
2020-06-02 12:12:41.376 PID<13136> INFO: Beginning Adaptiva Remote Install.
2020-06-02 12:12:41.385 PID<13136> INFO: Found: 1000: 1141 bytes
2020-06-02 12:12:41.385 PID<13136> DEBUG: Downloading content [IntuneP2PApp$RDCMan] to parent folder [DEFAULT]
Note that the content is being unpacked into the AdaptivaCache folder.
ResultArrayOfText[0]: IntuneP2PApp$RDCMan
ResultArrayOfText[1]: OneSiteIntune$fa013d77-a4c1-11ea-b2ca-00155d018420
ResultArrayOfText[2]: C:\AdaptivaCache\_$adaptiva$_\UnpackedContents\IntuneP2PApp$RDCMan\
And that the installation is being issued from here.
2020-06-02 12:12:51.271 PID<13136> DEBUG: Executing commandLine [C:\Windows\system32\msiexec.exe /i rdcman.msi] in directory [C:\AdaptivaCache\_$adaptiva$_\UnpackedContents\IntuneP2PApp$RDCMan\]
2020-06-02 12:12:52.436 PID<13136> INFO: Application install completed with code: 0
2020-06-02 12:12:52.436 PID<13136> INFO: Returning status 0
2020-06-02 12:12:52.436 PID<13136> INFO: Deleting unpacking folder C:\AdaptivaCache\_$adaptiva$_\UnpackedContents\IntuneP2PApp$RDCMan\
2020-06-02 12:12:52.436 PID<13136> INFO: Deleted file ...C:\AdaptivaCache\_$adaptiva$_\UnpackedContents\IntuneP2PApp$RDCMan\rdcman.msi
2020-06-02 12:12:52.436 PID<13136> INFO: Execution completed for content: IntuneP2PApp$RDCMan. Result: 0
2020-06-02 12:13:09.001 PID<14084> INFO: Beginning Adaptiva Remote Install.
2020-06-02 12:13:09.002 PID<14084> INFO: Found: 1000: 1166 bytes
2020-06-02 12:13:09.002 PID<14084> DEBUG: Downloading content [IntuneP2PApp$7-Zip-TestApp] to parent folder [DEFAULT]
2020-06-02 12:13:18.527 PID<14084> DEBUG: Result:
SessionId: {28E41045-13CF-5D31-4094-7B1E45073225}
ExecutionStatus: Succeeded
In the ContentDownload.log, located in the compontentlogs subfolder, there will be details about the source for the application content. This device is using the local LAN to grab the content rather than from Azure.
2020-06-02 12:12:50,028 - INFO - Content download progress percentage notification. ContentId :IntuneP2PApp$RDCMan, Content version: 1, Current download type: 0, percentage: 0, download source: LAN$192.168.2.183, Lan download(in bytes): 1024, Wan download(in bytes): 0 - StateTransitionProtocol - TID=33, Polling Thread
2020-06-02 12:12:50,028 - INFO - Sending notification: NotificationEvent :: <NotificationType:ContentDownloadProgressPercentage><NotificationQualifier:OneSiteIntune$fa013d77-a4c1-11ea-b2ca-00155d018420><Value:[Ljava.lang.String;@aacdb5 - ContentSystemNotificationSender - TID=8, AdaptivaTimer - SystemLifetimeManager. ExecutingTask-ContentSystemNotificationSender$ContentNotificationSenderTask
2020-06-02 12:12:50,698 - INFO - Receiving Progress Received For Content : IntuneP2PApp$RDCMan... Version:1, Receiving context : 978951 from ipAddress :/192.168.2.183 ,Bytes Received [1188932] - P2PDownloadProtocol - TID=33, Polling Thread
2020-06-02 12:12:50,698 - INFO - Invoking Receiving ended callback for receivingContext [978951] for ipAddress [/192.168.2.183] and ReceivedBytes [1188932] with status [1] - TransportCallbackMultiplexer - TID=33, Polling Thread
2020-06-02 12:12:50,698 - INFO - Receiving Ended For Content : IntuneP2PApp$RDCMan... Version:1, Receiving context : 978951 from ipAddress :/192.168.2.183 ,Bytes Received [1188932] - P2PDownloadProtocol - TID=33, Polling Thread
2020-06-02 12:12:50,698 - INFO - Client from which the content was being downloaded :/192.168.2.183 - P2PDownloadProtocol - TID=33, Polling Thread
In my case, much of the content was already on my local subnet, so only 80kb was downloaded from Intune, and the rest was gathered from other endpoints on my subnet. OneSite automatically determines the best way to get the content, saving bandwidth.